Heat Treatment of 1095 and 1095/15N20 Damascus Steel Part 2

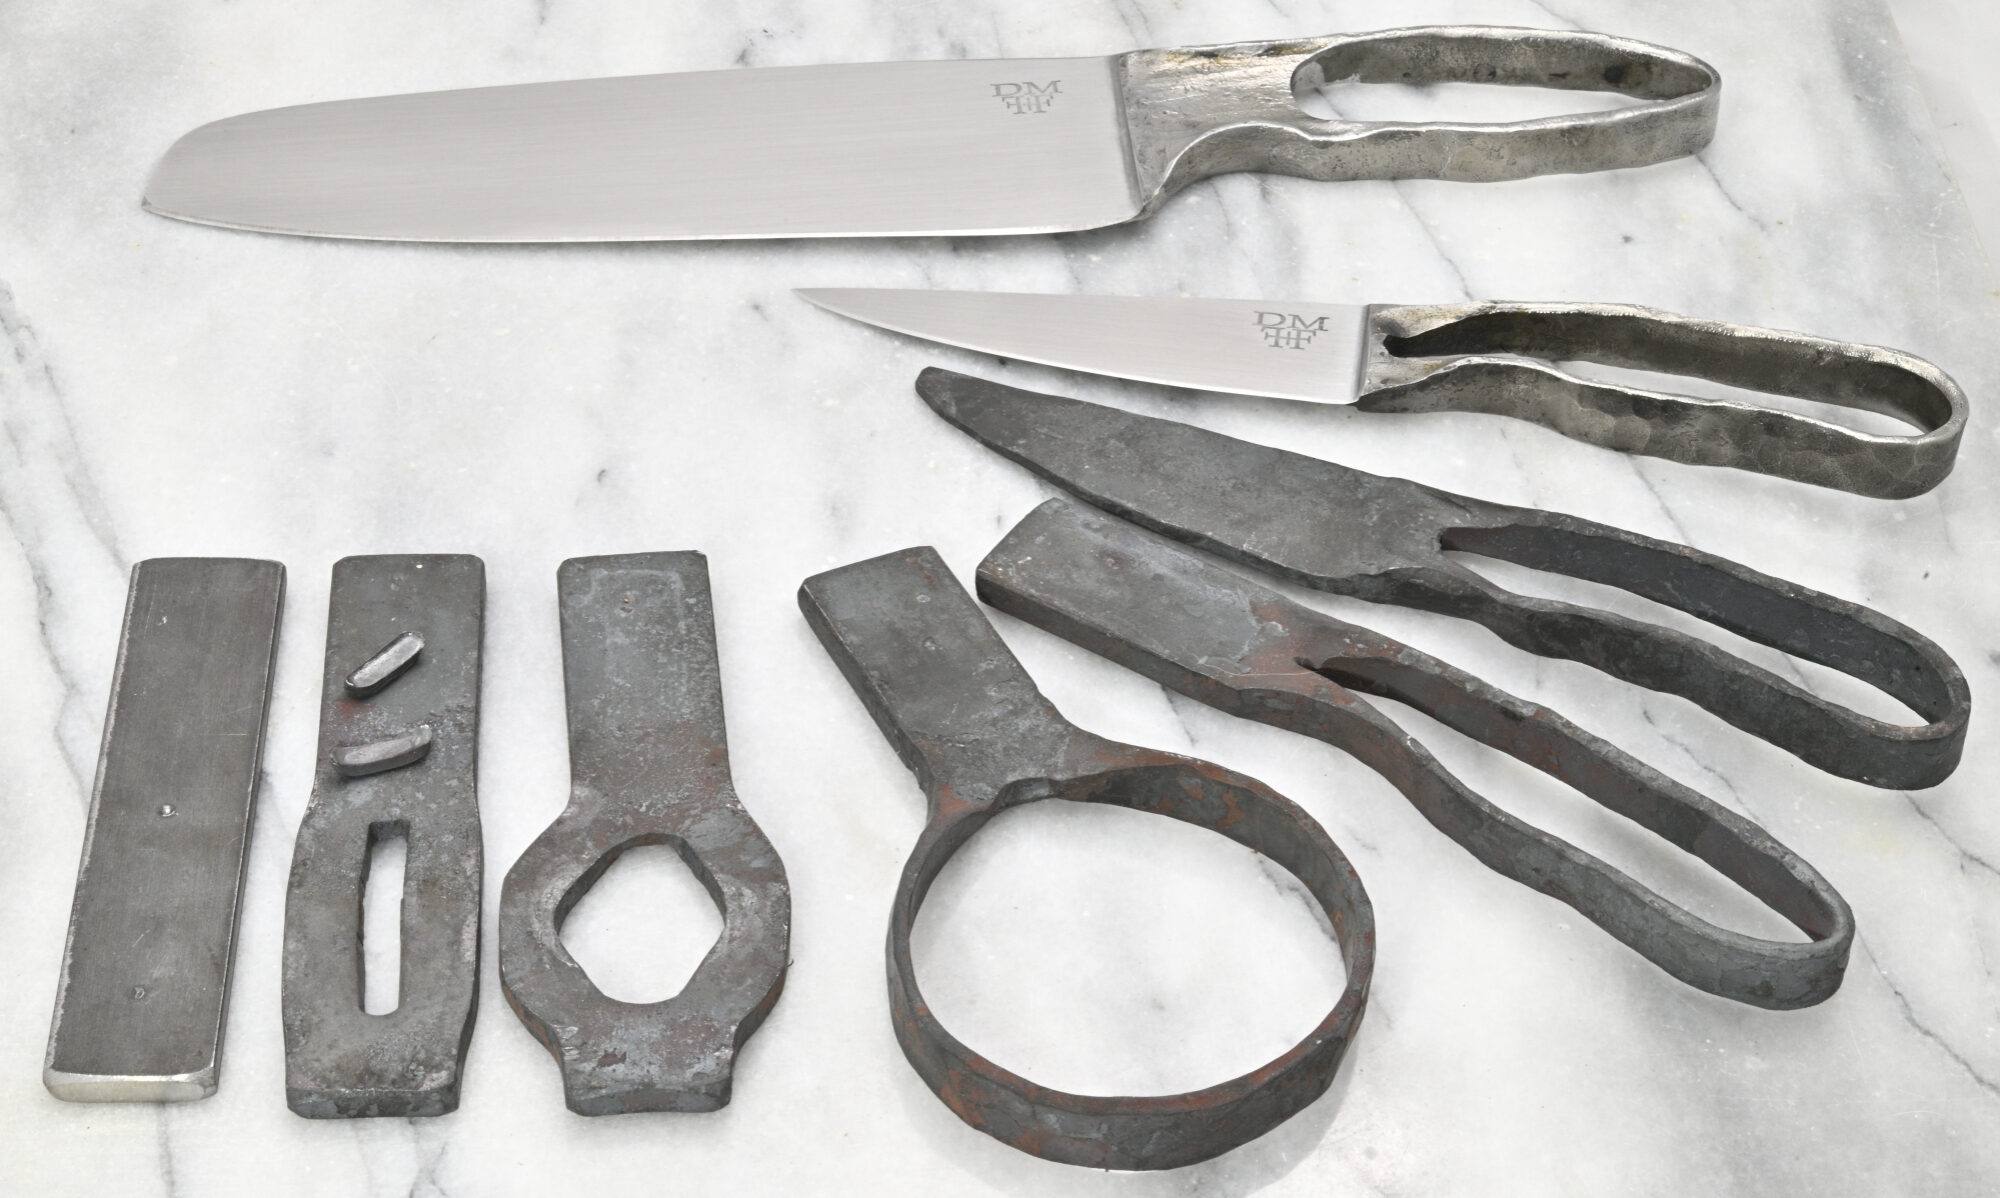
Now that the steel is annealed, this is the best time to grind, drill, file etc., while the steel is in a softer, machineable state. 


Anti-Scale

After grinding, drilling, etc., the steel is soaked for another 10-15 minutes at 500 F and anti-scale compound is applied again to prevent decarb during the long austening soak.  Often I’ll only coat the business end with anti-scale as I’m not as concerned with some decarb on the handle.


Austenizing and the Quench

After anti-scale is applied, the steel goes back in the HT oven and temp is ramped up to 1475 F.  The steel is soaked for 10 min once the HT oven hits temperature, and then is quickly quenched in warm (generally 65-110 F) Parks 50 oil, agitating the steel up and down.  Parks 50 is a fast quench oil meant to mimic water quenching with less stress and warpage.  In winter, when the oil is 20-30 F, I use an engine block heater to warm up the oil to recommended temperature, and occasionally in the summer I’ll use old blue ice packs to cool the oil if it’s too hot.  If you see lots of flames during the quench, then you’re breaking down your oil.  Quench oil isn’t cheap but will last a long time if used properly. 

Warpage

Straight out of the quench, the steel will frequently be warped.  I generally keep the steel in the oil for 7-10 seconds and when it comes out, it’s hot enough to be straightened by hand, or in a post vise (or post vise with aluminum quench plates).  Funny that sometimes I can see the warpage in the steel, and seconds later it will bend back to straight all on it’s own (or warp the other way if you correct it). 

The thinner the steel, the more it tends to warp. If a blade is still warped by the time it has cooled down to 200 F or so, then I generally re-quench rather than attempting to re-bend during tempering or cold working.  I’ve never had a blade crack or break during quench, but I have lost several trying to re-straighten during tempering.

Once the steel is cooled to 150-200 F, I put the steel in boiling water to remove the anti-scale compound, and then it goes straight into the toaster oven for snap tempering.

Snap Temper

This is an important part of the process that is sometimes overlooked.  HT ovens heat up much faster than they cool down… One way to avoid the need for snap tempering is to have a second HT oven dedicated to tempering to avoid waiting for cooldown.  I snap temper at approximately 325 F in a toaster oven while the HT oven cools.  This generally takes about an hour.  This is to avoid potential cracks that occur if a quenched blade is allowed to cool to room temperature.  Just because you don’t have cracks after quench doesn’t mean they won’t appear later if you leave the blade cool before tempering (this is a major flaw/issue in a popular tv show…)   Once the HT oven has cooled, the steel is removed from the toaster oven and cooled in water before heading back to the HT oven for proper tempering.

Tempering

Tempering is the part of the process where I have enough time to do other things away from the shop.   The HT oven is set for 375 F (kitchen and EDC blades) or 425 F (hard use blades, hoof picks, golf tools) and the steel is soaked for 2 hours time.  Then the steel is cooled off in water and the same tempering procedure is repeated.

Hardness Testing

Now the steel is ready for final grinding, hardness testing, hand sanding, etch, handles etc…  I haven’t been able to justify a proper Rockwell hardness tester, but there are alternative that can work well if you know how to use them properly.  Files and chisels of known hardness work well.  I have a set of chisels and these are what I’d strongly recommend over files.  The idea is to try to scratch the steel in question with the files – if the file/chisel is harder, the steel scratches, if the steel is harder, the file/chisel dulls.  Yes, it DULLS, that means once you use it and dull it, it needs to be sharpened again if you want a valid test.  Chisels are easy to keep sharp, removing minimal material, with a sharpening stone.  Files… not so much.  Before putting the final edge on the blade, I also test by shaving pieces of steel off a welding table I have nearby.

If all of the equipment is working properly but part or all of the steel surface isn’t hardening, decarb is likely the issue.  This can be verified by a quick etch in ferric chloride.

A good reality check in addition to hardness is breaking a sample piece of steel that was heat treated with everything else to analyze the grain size.  

Remember, all of this is specific to 1095 and 1095/15N20 Damascus steel.  Other steels generally will have different processes to optimize the final properties of the steel via heat treatment.

Heat Treatment of 1095 and 1095/15N20 Damascus Steel

Proper Thermal Processing or Heat Treatment (HT) is essential for making a high performance blade.  Geometry and steel selection are very important as well, but without correct HT toughness and the ability to hold an edge will be lacking.

Different steels require different HTs – the process outlined here is what I use for 1095 steel and for 15N20/1095 pattern-welded steel.  The process is similar for 1080/1084 or CruForgeV steels, although 1080/1084 doesn’t require the annealing step described here.

Forging steel, especially at high temperatures needed for forge-welding, disrupts the structure within the steel, especially the distribution of carbides.  This is especially true for 1095 steel, which has more carbon than it knows what to do with.  This leads to the need for annealing or spheroidizing the steel after heavy forging to ensure the structure of the steel is ready for hardening.  

These are the steps to my HT process:
– Apply anti-scale compound
– Normalize
– Grain reduction cycle #1
– Grain reduction cycle #2
– Anneal
– Rough grinding/filing/drilling
– Austenize
– Quench
– Snap Temper
– Temper #1
– Temper #2
and at the end of this process, the blade is ready for final grinding, hand sanding and etching.


Part 1 covers up through annealing, and Part 2 will cover the rest.

After forging something to shape, be it a blade, pry bar, golf tool etc., and letting it cool down, it goes back in the forge for a quick stab at normalizing.  For these steels, that means heating it up to roughly 1575 F and then air cooling.  In this step, air cooling is most often done by setting the glowing steel on a bed of coke on my coke forge, but sometimes by putting the end of the handle in a vise.  This step is done in still air – if it’s windy outside, the forge doors are closed so there isn’t a breeze cooling the hot steel too fast.  In general I run the forges with a reducing environment where there is minimal free oxygen, so scaling and decarburization (decarb) is minimal – with a typical heat treat oven, that is not the case.

Anti-scale Compound:  Avoiding Decarb

Once I’ve got enough things forged to justify turning on the HT oven (an Evenheat 22.5 LB w/ TAP controller) the first step is to warm up the tools to be heat treated to 500F (soaking at that temperature for at least 10 minutes) so that the anti-scale compound that I use will adhere to the steel.  Currently I’m using Brownell’s Non-Scaling Compound (https://www.brownells.com/gunsmith-tools-supplies/metal-prep-coloring/heat-treating-accessories/non-scaling-compound-sku083015100-1122-4011.aspx).  I’ve tried others, but I’ve found this to be the most effective and easiest to apply, and it will stay on for several cycles in the HT oven.  I keep this in an oversized salt shaker, stored in a zip lock back.  Once tools are done soaking at 500 F, I apply a generous coating of the compound before tools go back into the HT oven for higher temperature processing.

Without anti-scale compound, an inert gas environment, the reducing environment of a forge, or a vacuum, carbon will constantly be lost from the steel, resulting in decarb.  That is, you end up with a thin layer on the surface of iron (steel minus the carbon) which will not harden.  This is a very bad thing on the edge of a blade, but not necessarily a bad thing elsewhere…  If you’re not ‘etching’ the steel after decarb forms, then it’s unlikely you’ll see it.  Etching the steel in ferric chloride will quickly show you if decarb is present as it appears sort of hazy (on the left side of the image below, by the forge marksI call it ‘bling’ as it’s usually got a crystalline look to it)

Normalizing

Now that the steel is protected from oxygen, the next step is normalizing – this helps reset the grain structure and make it more uniform and also relieves some of the built-up stress in the steel.  With the HT oven still at around 500 F from the anti-scale application, the blades are put in the HT oven and the temp is ramped up to 1575 F and the steel is allowed to soak for approximately 10 min once the oven reaches that temperature.  Then the blades are removed and allowed to air cool, usually clamped in a vise.  I usually have two batches or more, so the first batch cools down while the next batch soaks in the oven.  Again, still air here – I keep the shop doors closed for this step if there’s any wind outside.

Grain Reduction


After normalizing, where we’ve made the grain size more uniform (more normal), the next steps are to further reduce the grain size.  This is basically the same process as normalizing, but done at a lower temperature.  Blades go in the HT oven, temp is ramped up to 1450 F and everything is soaked for approximately 10 minutes and then removed to air cool.  Cooling speed isn’t as critical here, so instead of clamping the handle in a vise, the blades are set on a small shelf of expanded metal to air cool.  Once cool, the same process is performed a second time.


Annealing/Spheroidizing


For a while, I used the temper anneal process, where blades were austenized, oil quenched, and then soaked at 1200F for 30 minutes.  But once I learned about Divorced Eutectoid Transformation (DET) annealing I did some testing and quickly switched to that process.  Annealing is a step that can be skipped with steel like 1080 – just normalizing is enough to make it easy to drill or saw and it’s not required to get it ready for austenizing/quenching.  However, with the extra carbon in 1095, annealing is required to break up the carbide structures that form during forging and extended time at high temperatures and to get the steel ready for austenizing/quenching.
Following normalizing and grain reduction, the DET annealing is done by putting the blades in the HT oven, ramping the temperature up to 1380 F, soaking for 30 minutes and then slowly ramping the temperature down to 1200 F at a rate of 670 F/hour.  Once the oven reaches 1200 F, the blades are removed and allowed to air cool.
Finally, I put the blades in a large skillet with some water and boil for a few minutes which remove the anti-scale compound.  


Next up will be Austenizing–>Quenching, Tempering, testing hardness and checking grain size in Part 2.


In the mean time, check out one of the best books out there an heat treating steels specific to knifemaking:

https://www.amazon.com/Knife-Engineering-Steel-Treating-Geometry/dp/B08D4P9D95